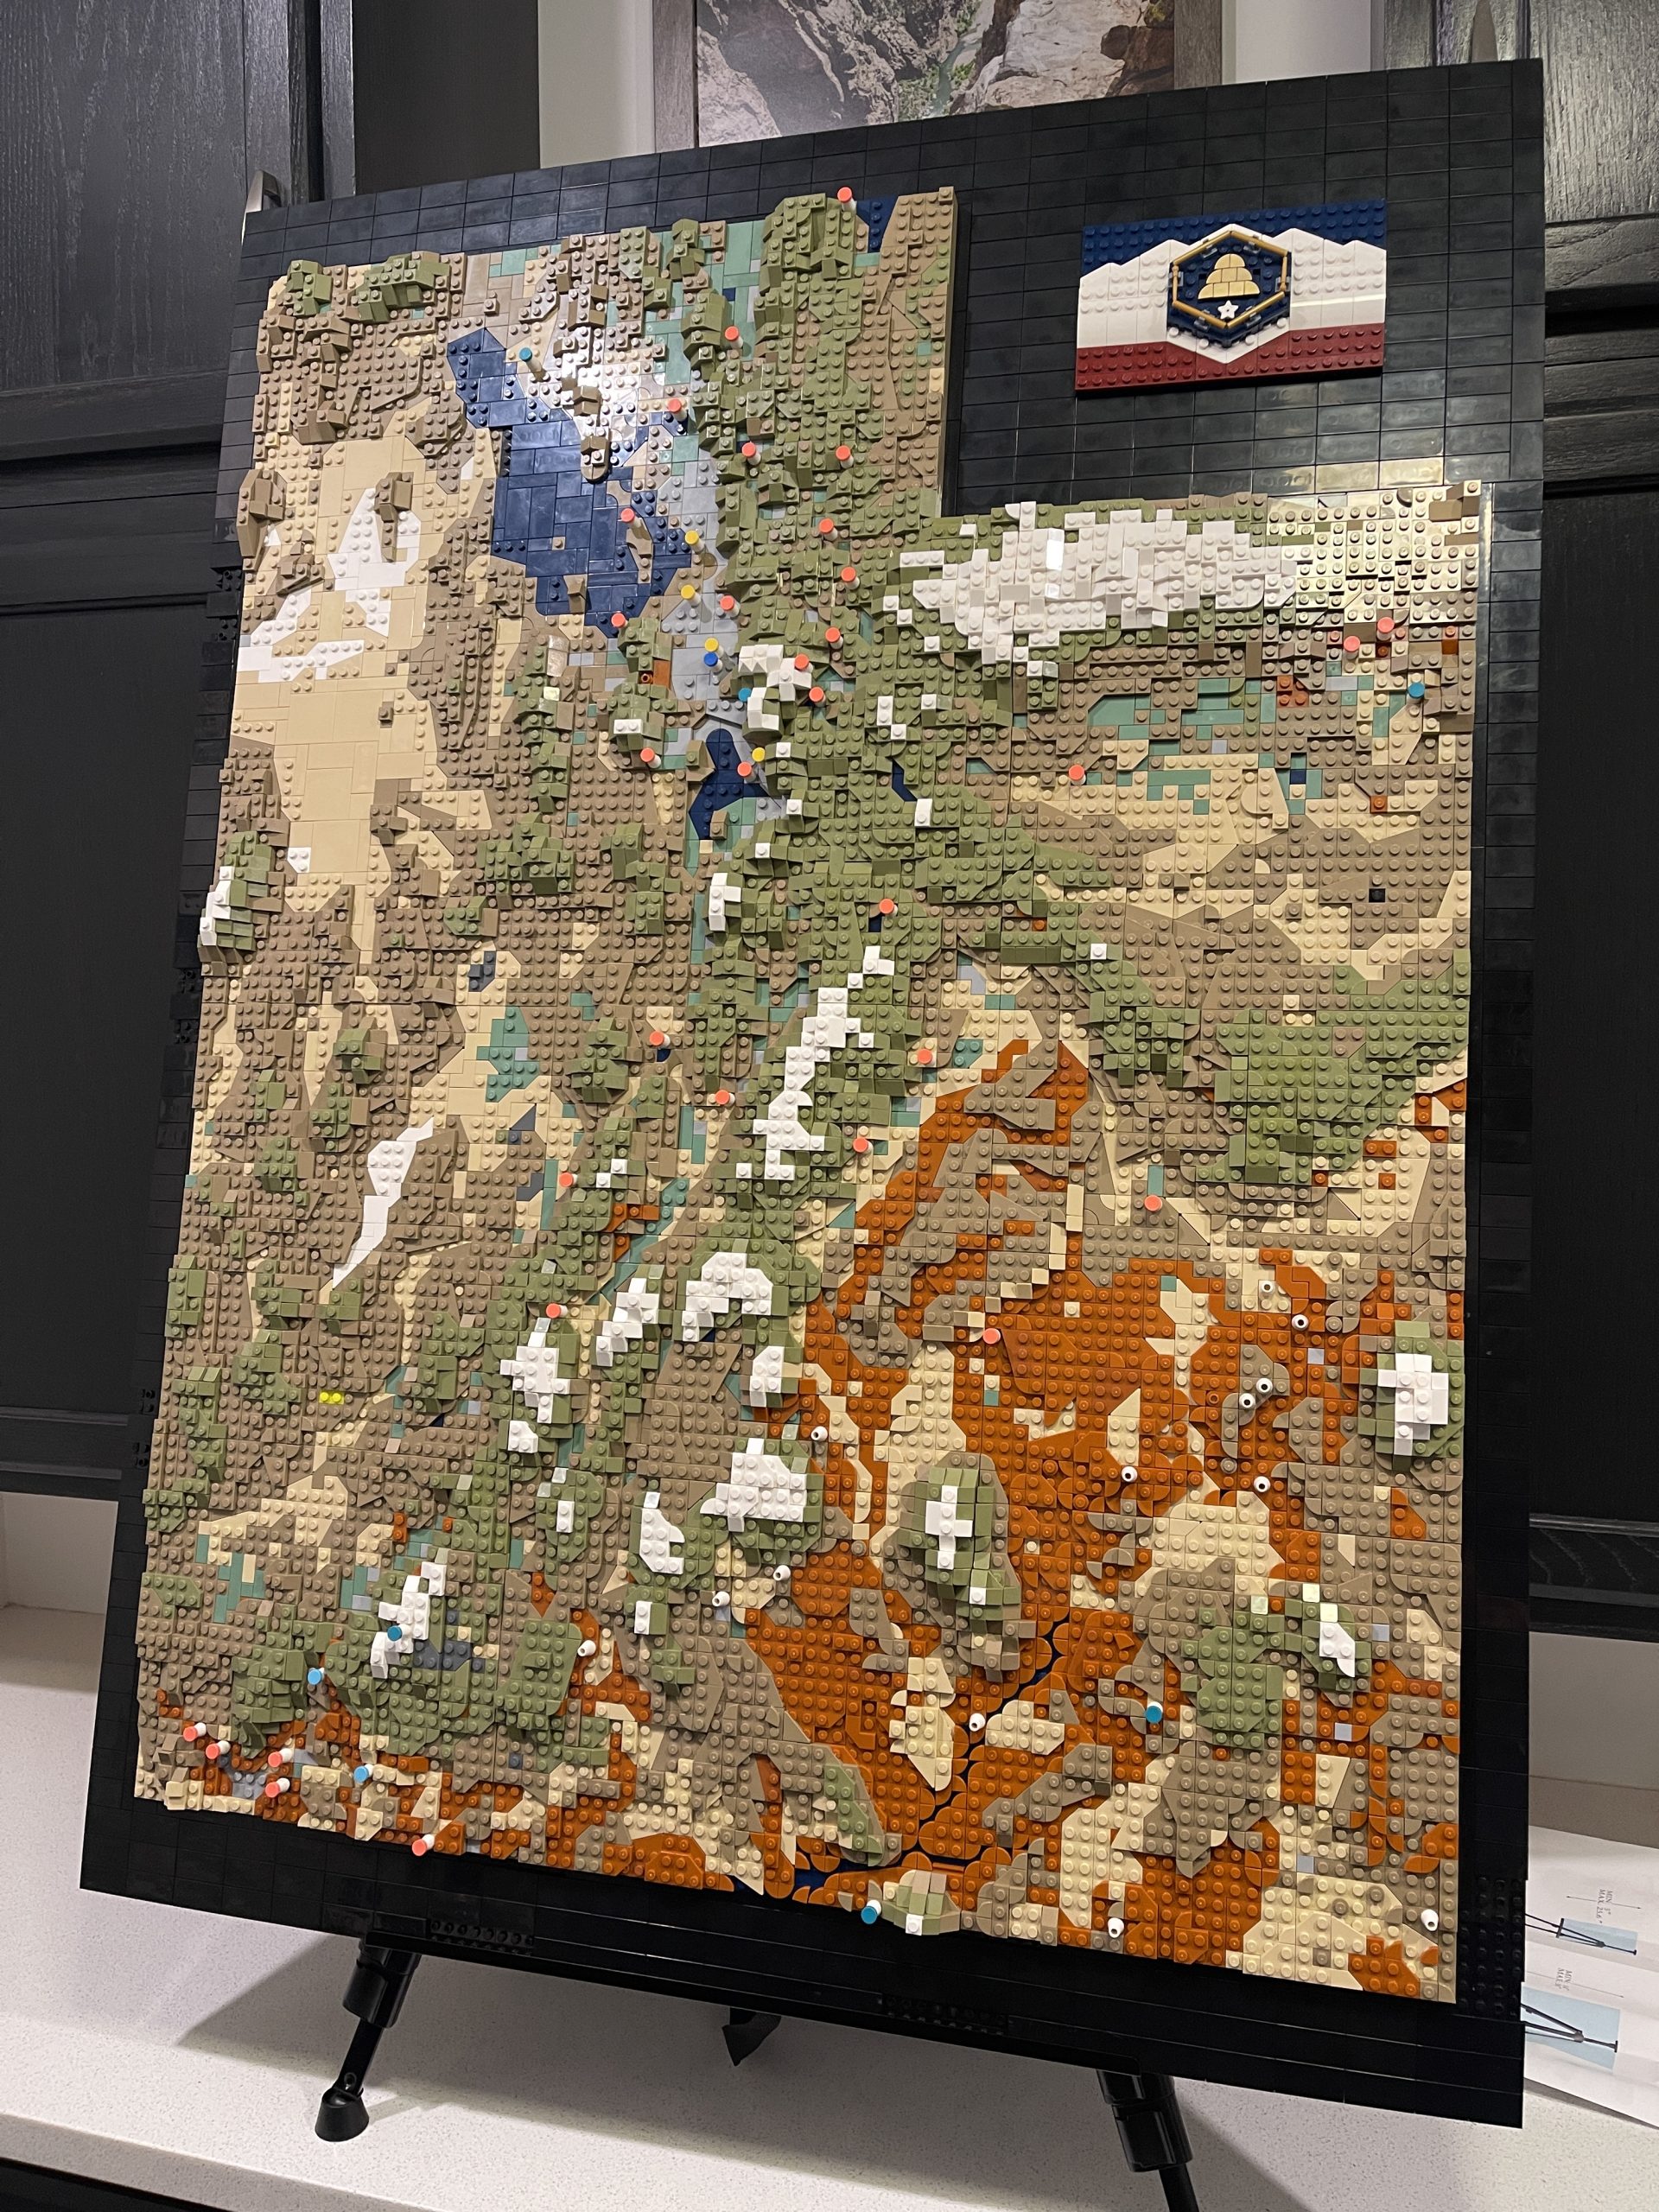
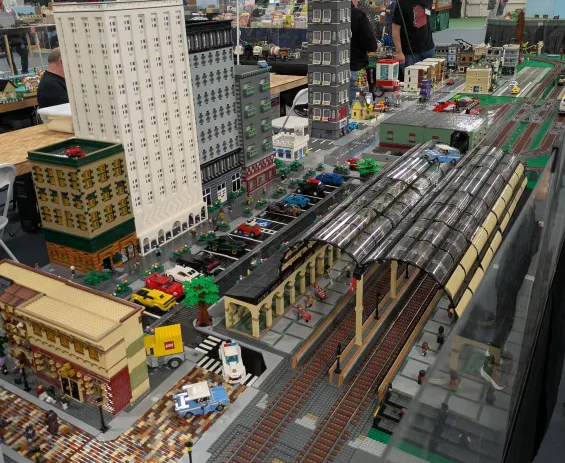
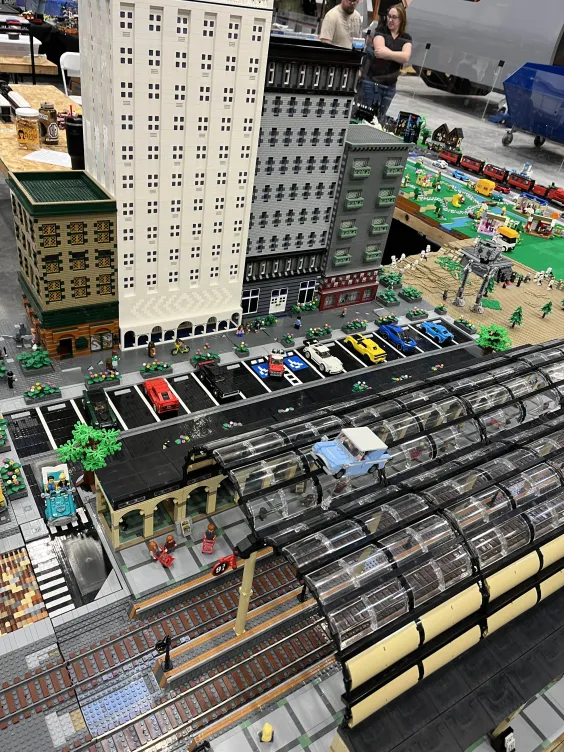
MOC by ULUG member Jason on display at BrickSlopes 2025.
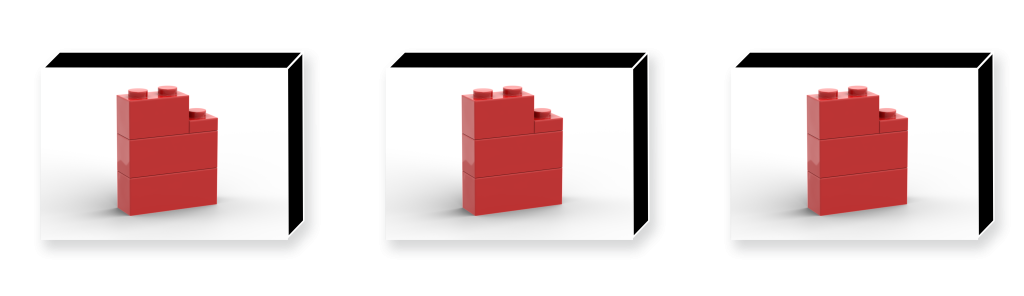
A MOC stands for My Own Creation. A MOC is any custom build made without following official LEGO instructions. A MOC can be anything, in any size – a spaceship, a car, a castle, a sculpture, a building, or anything else you can imagine and bring to life with bricks.
Building custom creations out of LEGO bricks is a fun and artistic expression of creativity and engineering. All it takes is a few bricks, some patience, and some creativity to create something new.
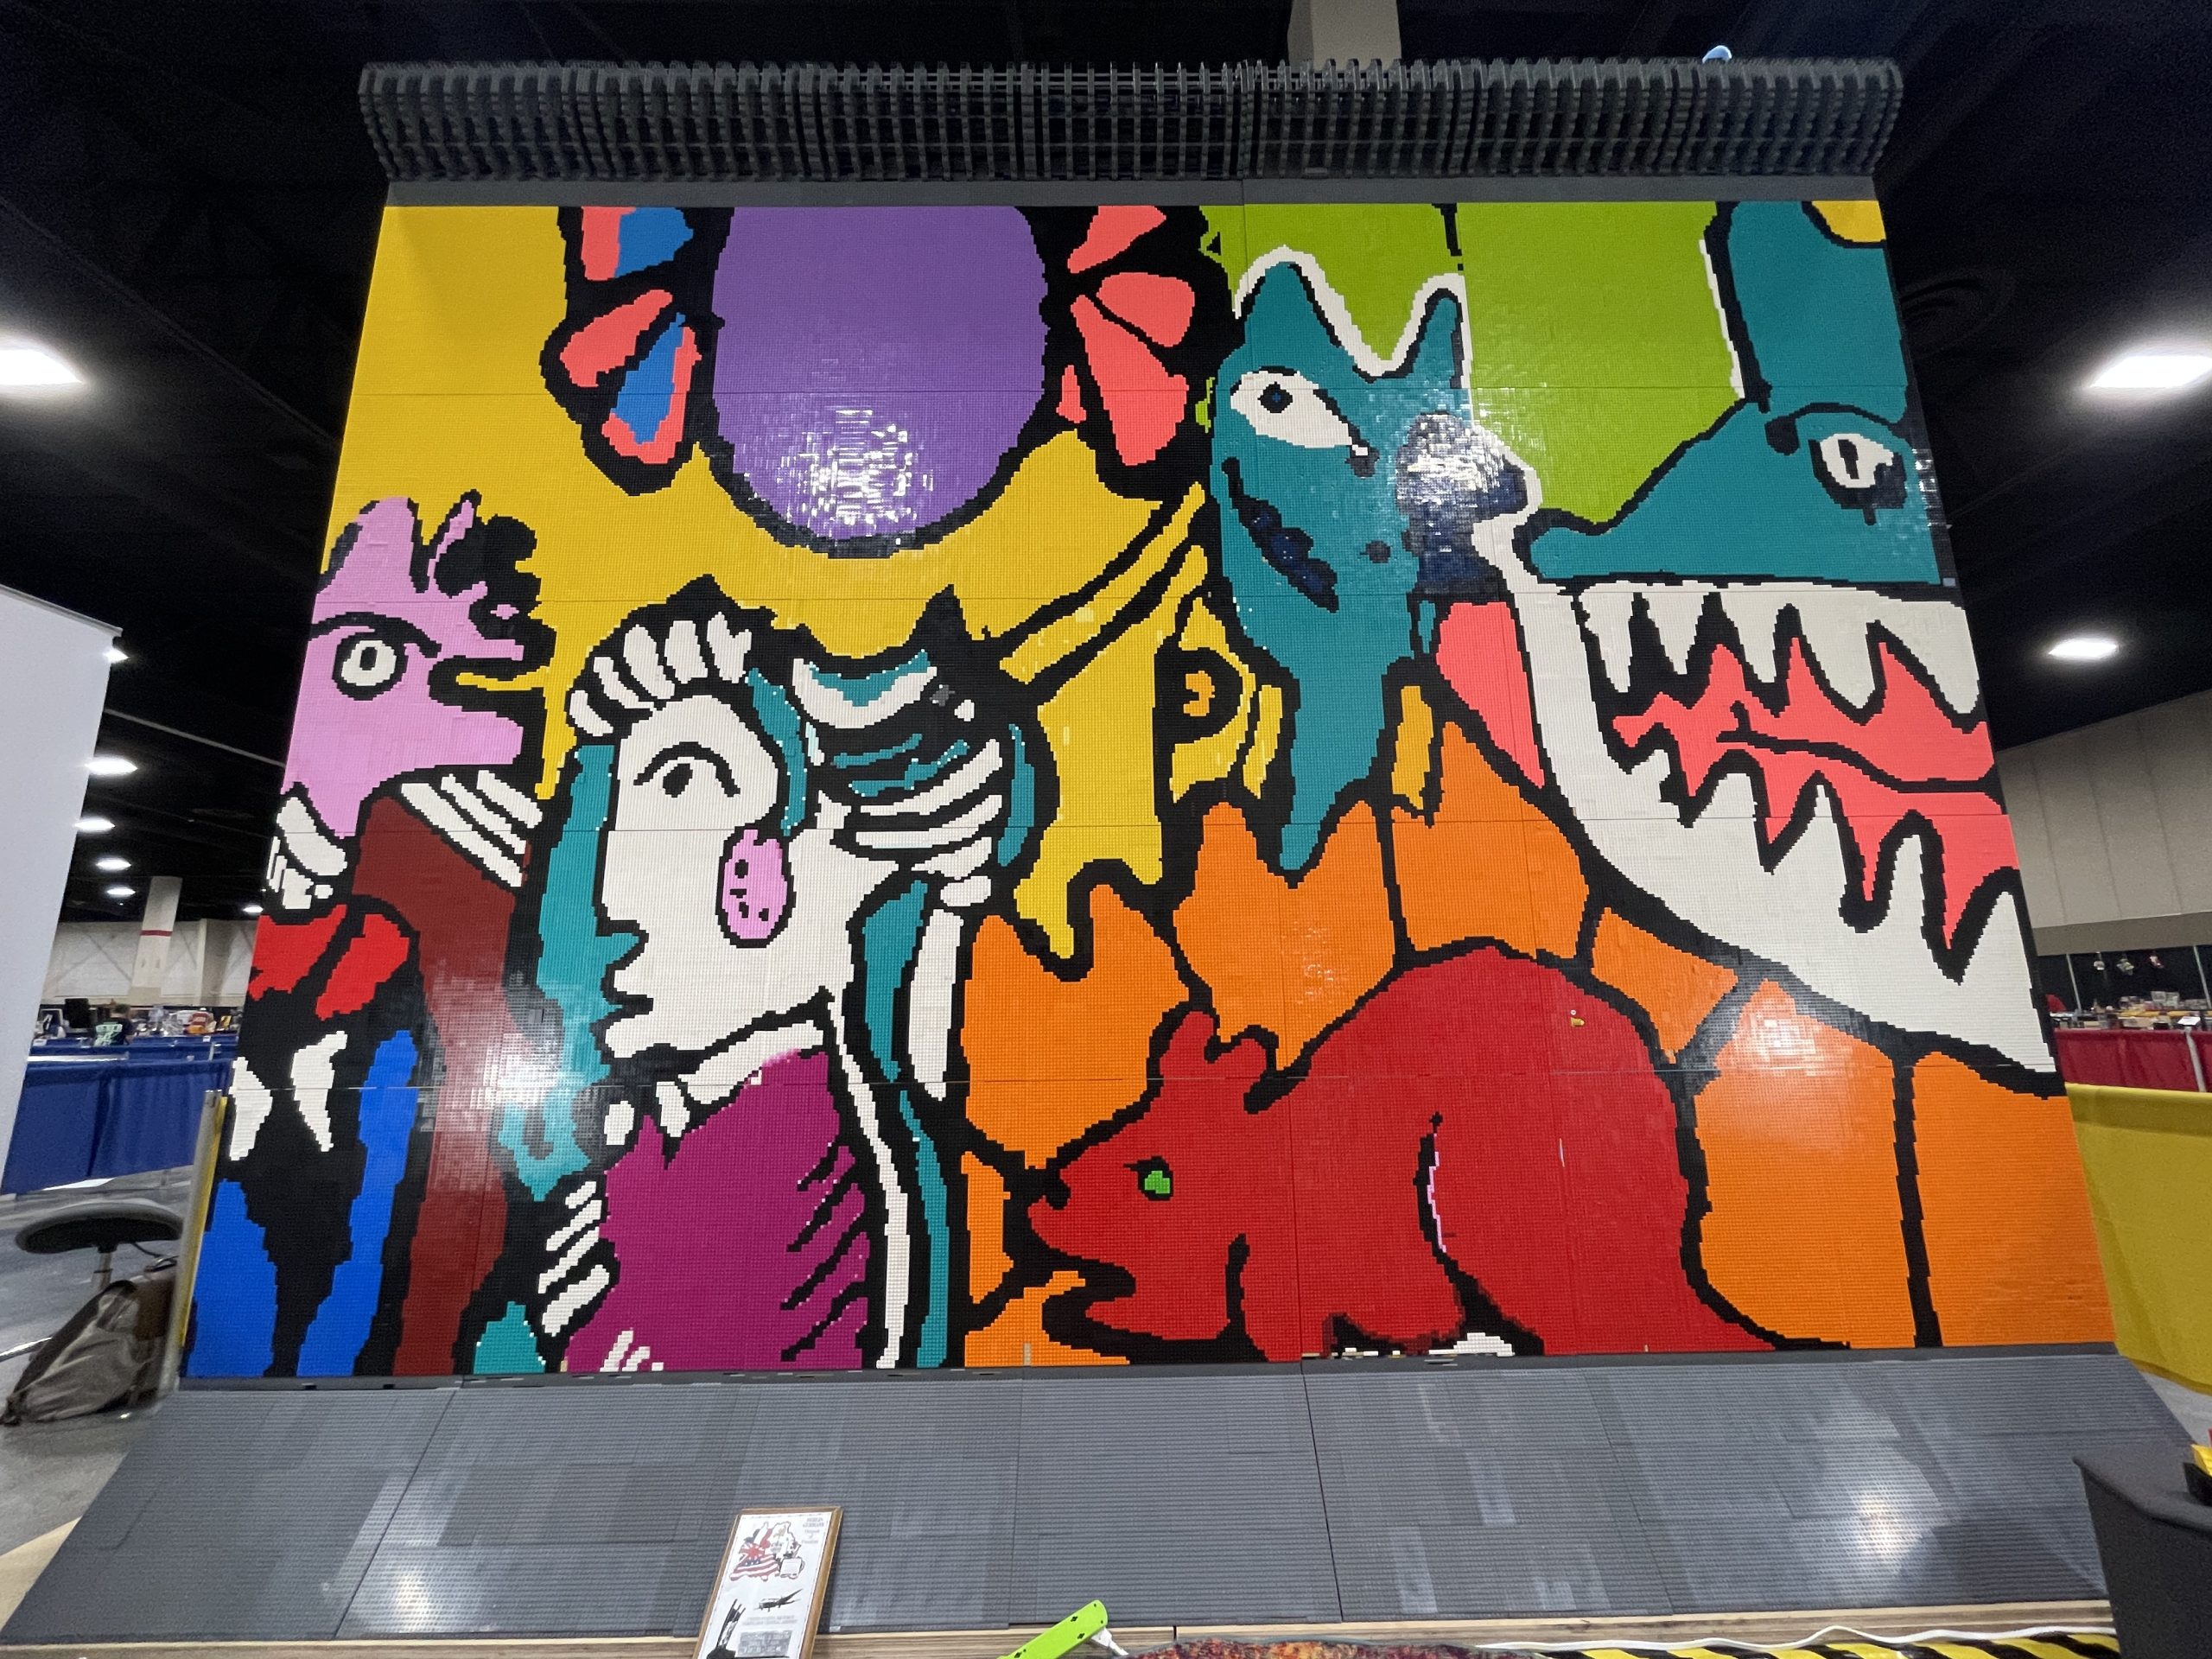
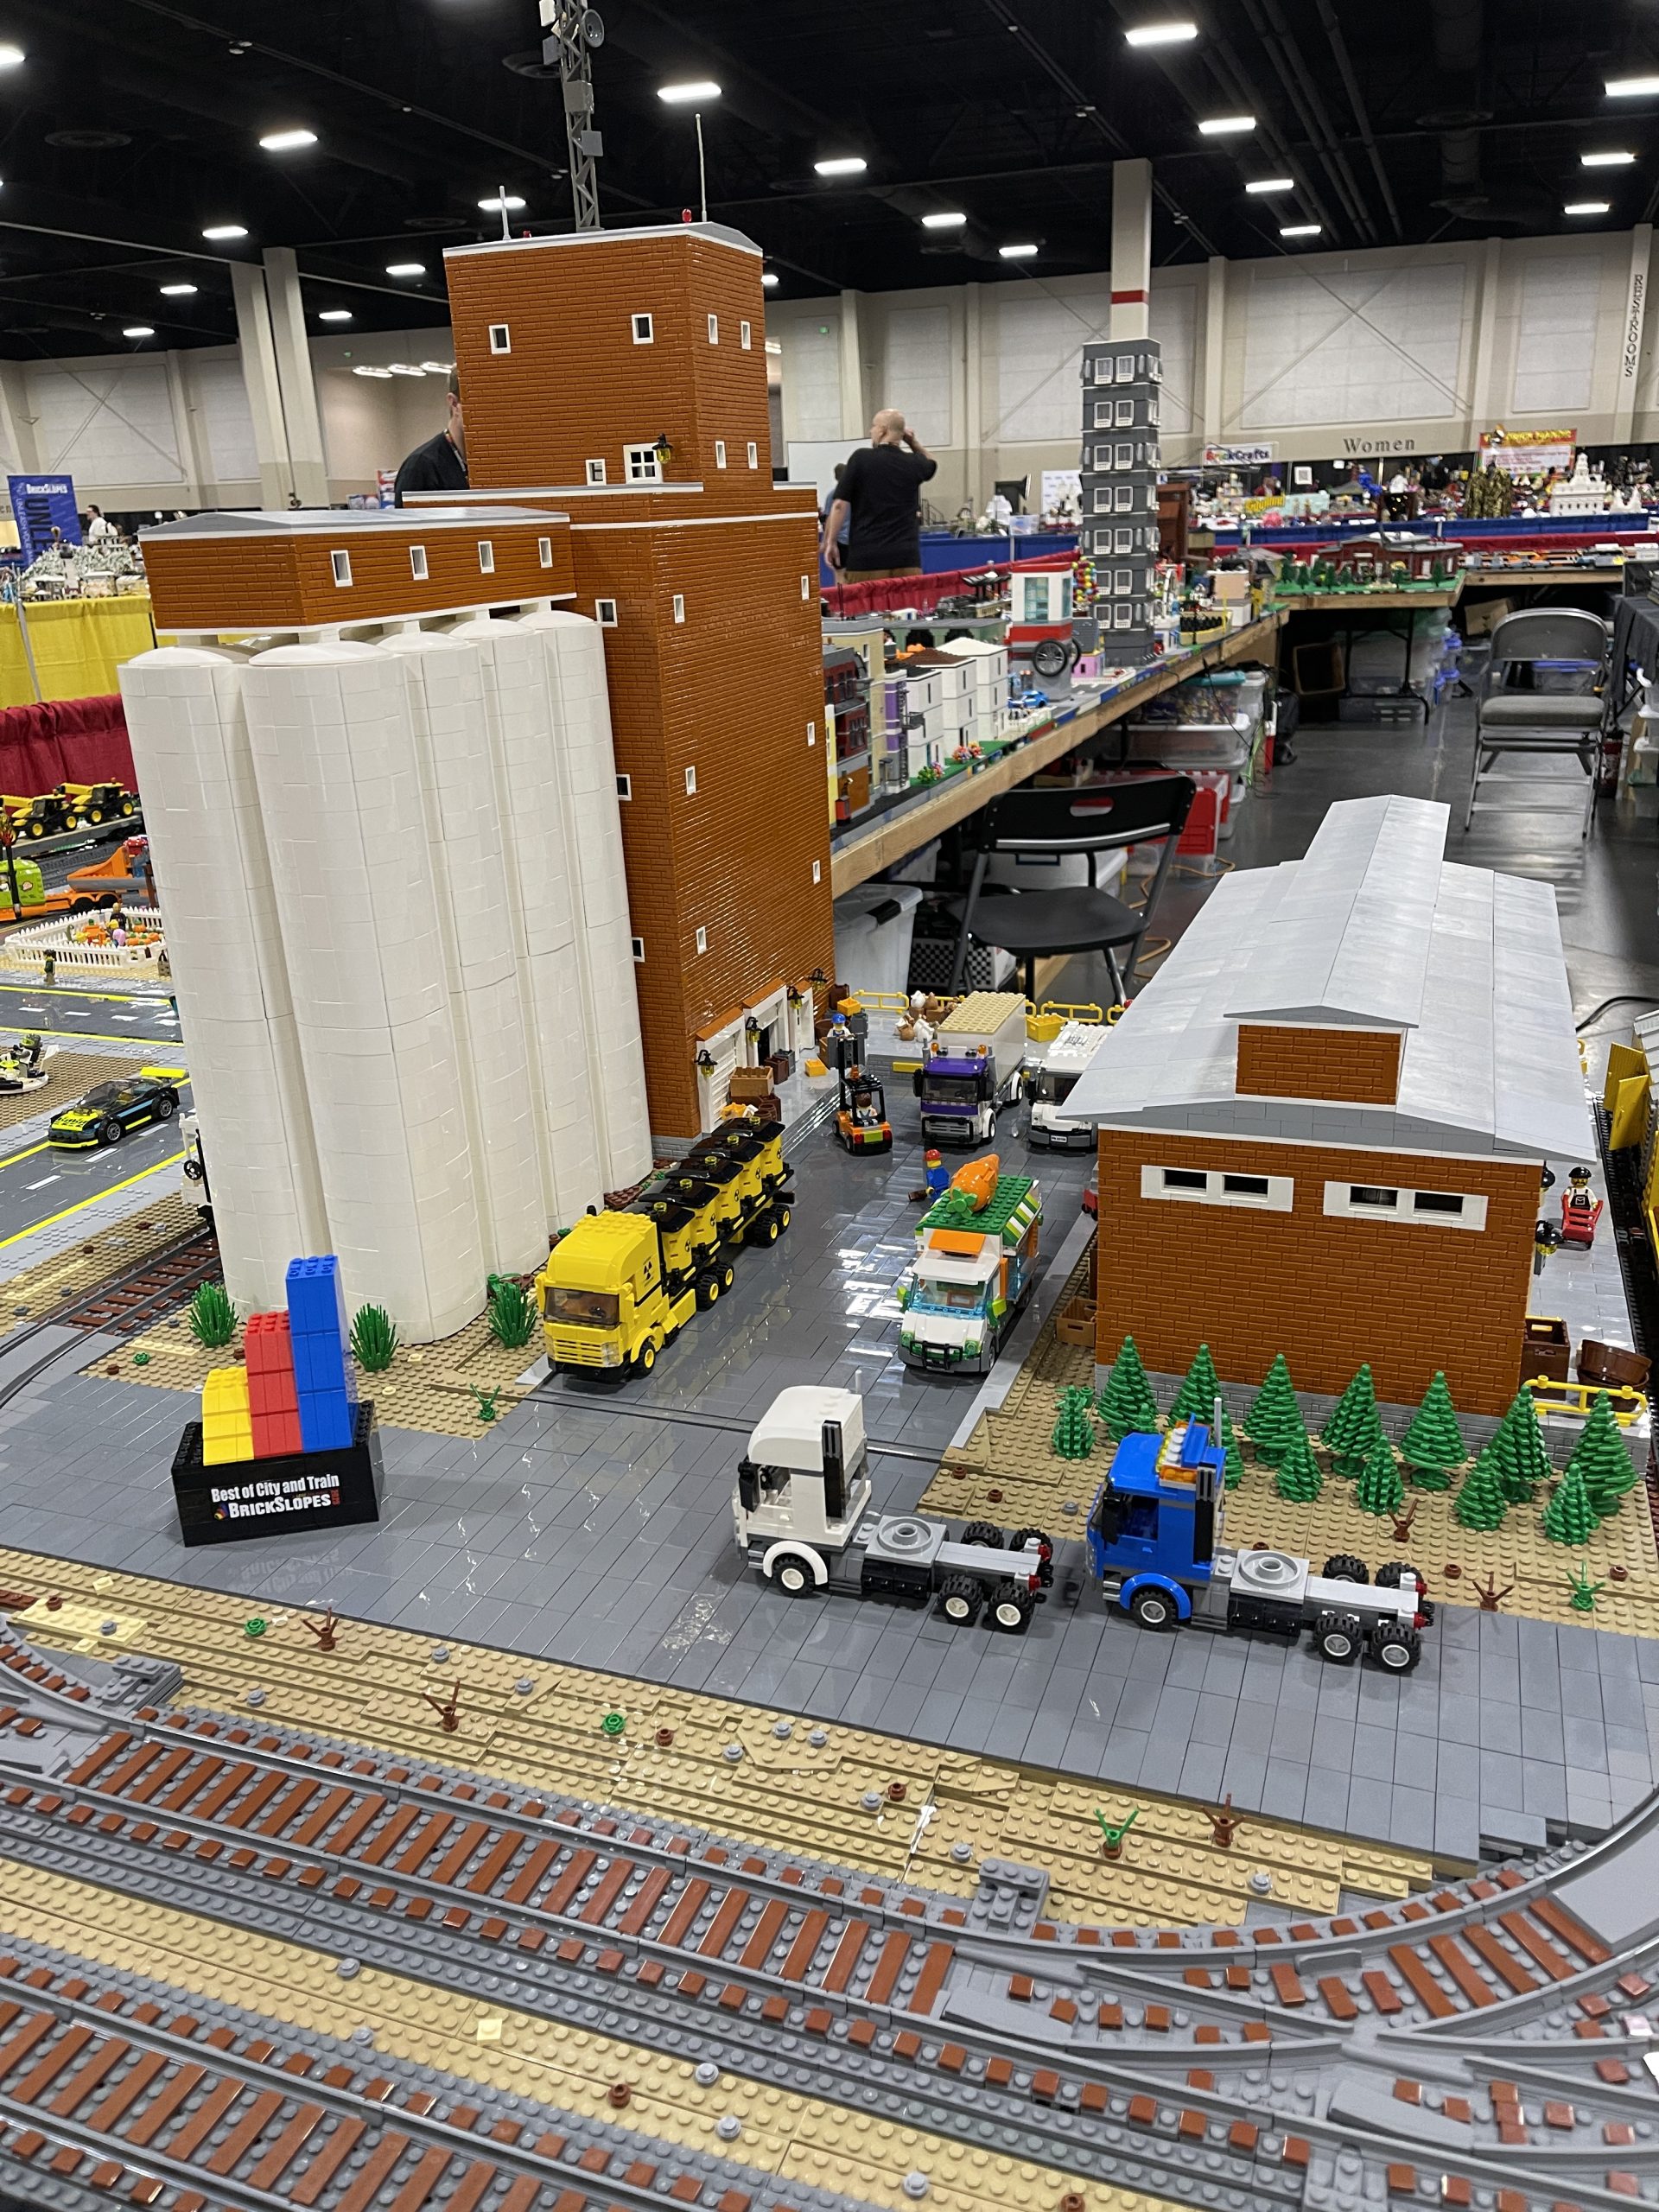
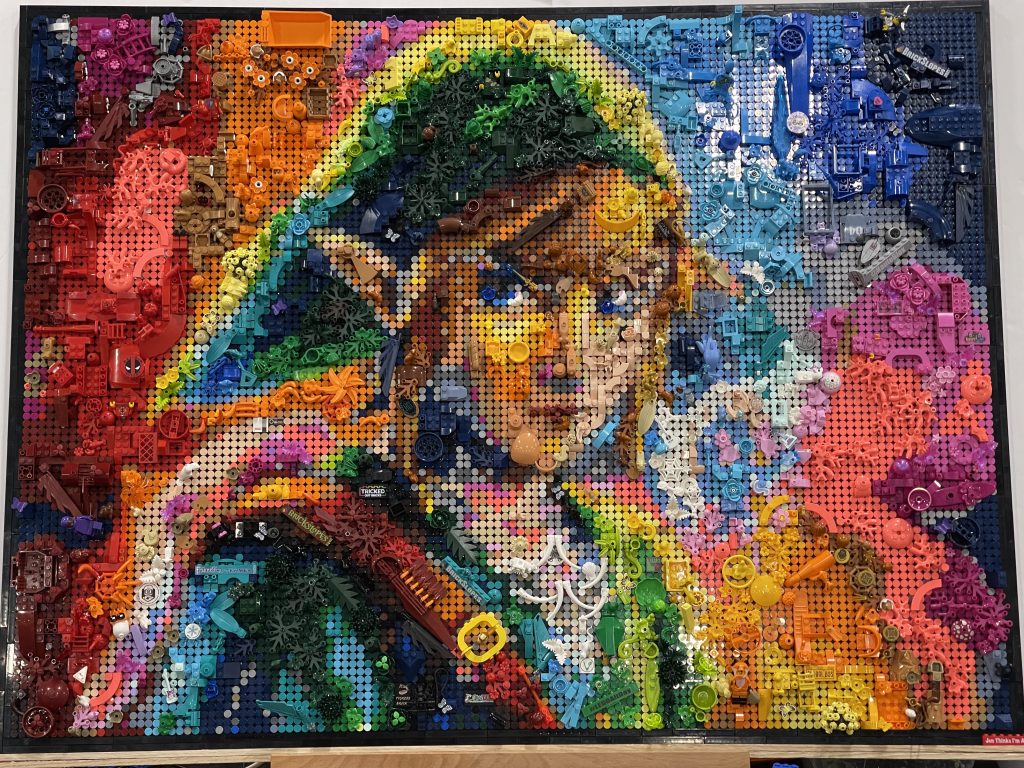
MOC by ULUG member MaddieMOC by ULUG member JacksonMOC by ULUG member MikeMOC by ULUG member WillGiant MOC by ULUG member BrookeMOC by ULUG member Will
Share Your MOC
Each meeting has time set aside for ULUG members and guests to share MOCs with the group. Just bring your MOC up to the table when you arrive! Meetings are a great time to show off cool builds, ask for feedback from other members, and inspire fellow builders.
Each MOC gets time for the creator to introduce themselves, share their build, and highlight one or two things about it.
Named after sports drafts, a parts draft lets participants take turns choosing LEGO parts they want in higher quantities.
Drafts are a cost-effective way to get LEGO parts in bulk, and a fun way to interact socially with other builders.
Multiple copies of a LEGO set are opened and sorted into groups of identical parts (same shape and color). Each group is called a lot. When it’s your turn, you choose one lot and keep all of the pieces. Drafting continues until all of the lots are gone — and everyone leaves with a big pile of parts.
How do I participate?
Participation is simple! All you need to do is:
Come to a ULUG meeting.
Pay the $20 participation fee (see details below).
Have fun and leave with lots of new parts!
Tips for First-Timers
Look over the parts list ahead of time. Some builders draft for their next project, some look for high-value parts, and others just want unique colors or elements. Having a few parts in mind helps you feel less rushed during your picks.
Bring a bag. You’ll end up with a lot of loose pieces. A gallon-sized zipper bag, several small bags, a hobby organizer, or a box all work well.
Don’t overthink your picks. Try to get the parts you care most about early on, and don’t overthink the rest. All of the parts you get can be useful. If you’re unsure what to grab, here are some parts we never seem to have enough of:
Have fun! Be a good sport and don’t take the draft too seriously. Everyone is there to get cool parts and build cool things. You’ll walk away with great parts, even if you don’t get all of your top picks.
ULUG Draft Details
Sets and Participants
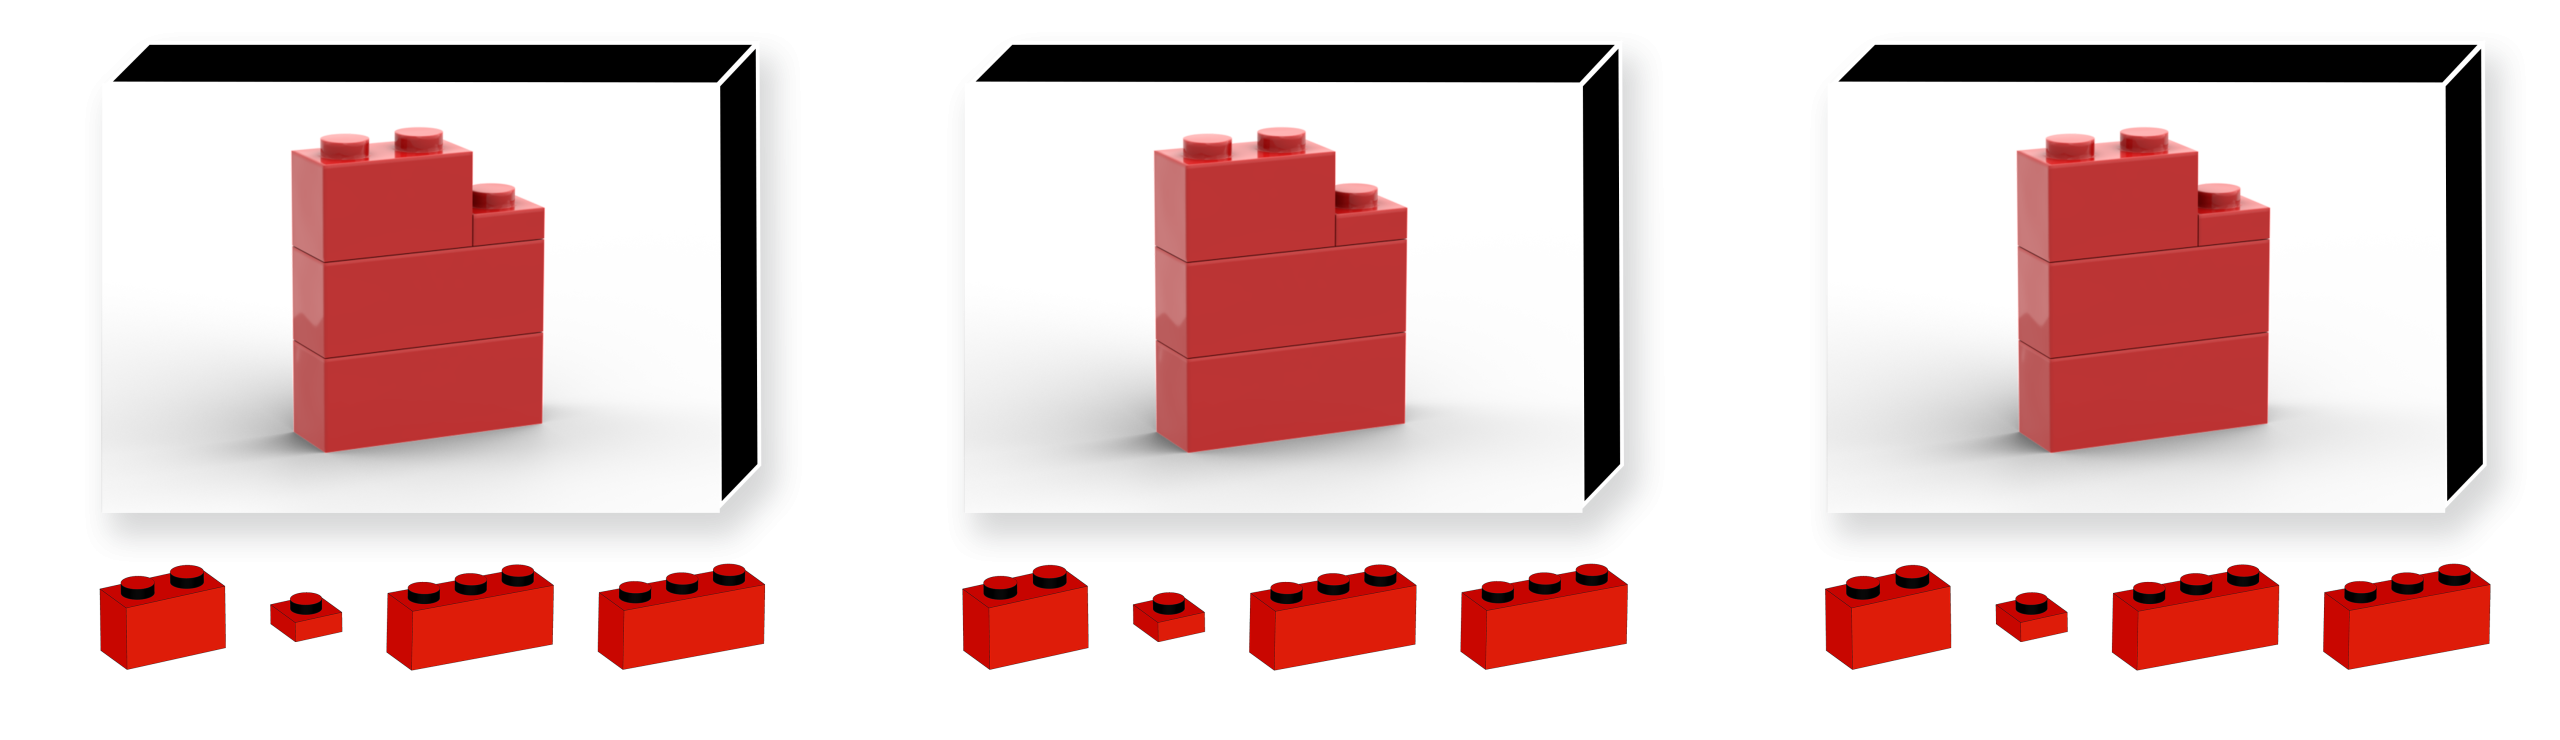
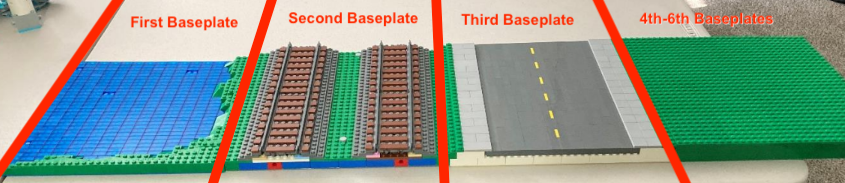
Multiple copies of the same set to draft. Simplified example.
ULUG provides multiple copies of the same set for each draft, so participants do not need to bring a set. Each draft set is announced ahead of time on Discord. The number of sets opened depends on how many people participate.
Payment is made at the time of the draft; there is no sign-up or reserved spots. The participation fee is $20. Payments can be made via PayPal, Venmo, or cash.1 Members may purchase multiple draft spots.
Part Out the Set
Parts sorted into lots. Simplified example.
Once the regular meeting is over and the drafting portion begins, participants open the sets and sort all unique pieces — every part in each color is separated into its own lot.
There are a few exceptions:
Minifigures: Assembled together, including legs, torso, head, hair or headgear, and fabric elements such as skirts or capes. Accessories like weapons or tools are separate lots.
Paired or functional elements: Pieces designed to work together, such as two halves of hinges or turntable bases and tops, are kept in a single lot to ensure they function properly in builds.
High quantity lots: Occasionally, after combining multiple copies of a set, a lot may have a very high quantity of pieces. These lots can be split into smaller lots so more participants have a chance to pick them. Decisions about splitting are made by the ULUG officer overseeing the draft before the first pick is made.
Some sets have very large quantities of highly-desirable or rare parts. Those can be split into multiple lots to allow more people a chance to walk away with them. These decisions are made by the ULUG officer overseeing the draft (normally with input from the group) as the parts are being sorted.
Sorting is a fun and social group activity, and getting to know your fellow sorters is encouraged.
Draft Order
Once the participant list is finalized, a club officer or their appointee determines the draft order randomly. Since going early in the first round provides an advantage, randomizing the order ensures fairness for all participants.
Drafting the parts
Once the lots are set up on the table and the draft order is determined, the draft begins. On their turn, each participant chooses a lot and keeps all of the pieces.
A few picks work differently:
Minifigures: Each individual minifigure counts as its own pick.
Instructions and stickers: Each set of instructions or stickers counts as its own pick.
To keep the draft fair, the pick order reverses after each round. This means the last drafter in one round goes first in the next. This pattern continues until all lots are picked. This reversing order is often called a snake draft, named for the way a snake’s head weaves back and forth as it moves.
Once the last lot is picked, the draft ends — and everyone walks away with a bulk of fun parts!
If paying in cash, the exact amount is required. No coins or large bills are accepted. Electronic payment is preferred. ↩︎
Members can sign up to display by joining ULUG and participating in event planning. Each event has a dedicated Discord channel where:
Event details are shared.
Builders coordinate layout and space.
You can post how much you’d like to bring.
Simply find the event channel and let the group know your plans. Further details and coordination will happen there.
Display Sections
ULUG displays are organized into standardized sections, often called MODs (a common term in train clubs). The full club layout is built from these sections so tables can be planned accurately.
A standard display section is:
3 baseplates wide.
6 baseplates deep.
Approximately 2.5 feet wide × 5feet deep.
Train loop sections are the same size, but have additional standards.
A Train Loop Section (MOD)
Many events also include a separate area for smaller MOCs, which are welcome and encouraged. Some events only have space for a train loop.
Space signup is done by requesting a certain number of sections, and specifying whether that build is part of the train loop.
The event coordinator will share setup times and logistics via Discord. We typically set up tables and builds before the public arrives.
One important rule when working around LEGO: never touch someone else’s build. If something needs to move or is in the way, always find the builder or the event coordinator.
During the Event
Builds are separated from the public with clear plexiglass attached to the display tables. This helps ensure the public doesn’t accidentally break anything—or (perhaps purposefully) walk away with minifigures or parts.
If you’re able to stay during public hours (even for a portion), you’re strongly encouraged to do so! Interacting with the public is rewarding for both builders and viewers.
Take Down
The event coordinator will share takedown times and logistics via Discord. Takedown usually goes much quicker than setup. Packing and loading club tables is a lot of work, so any help is greatly appreciated.
Be sure to report your participation using the participation survey. This helps with membership status and allows us to include photos of your build in the event report on the website and for LEGO.
Displaying at BrickSlopes
BrickSlopes is the largest LEGO convention and show in the Mountain West. It is not a ULUG-organized event, and ULUG membership is not related to BrickSlopes participation in any way. However, many ULUG members present their biggest and best MOCs at the show, and it’s a great opportunity to meet builders from around the country.
To display at BrickSlopes, you will need a pass directly from the convention and coordinate builds through their website and/or communication platforms.
While not a ULUG event, ULUG typically partners with BrickSlopes to organize and sponsor the train loop at the event. The loop is open to all BrickSlopes displayers, regardless of ULUG membership.
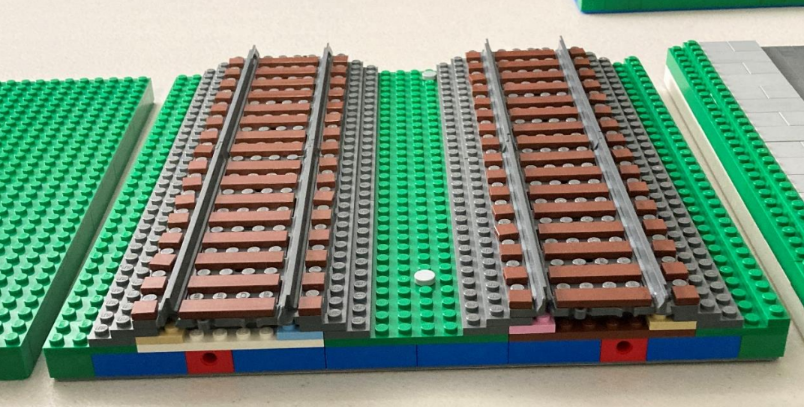
A major feature at many of our events is the train loop, where multiple builders connect their sections side by side and run trains across many different builds. For the loop to work smoothly, all builders must follow a set of standards for track placement, heights, and track alignment.
Layout Overview
Each section of the loop (called a MOD, as is common with train clubs), has a basic layout of 3×6 standard LEGO baseplates (32×32 studs each). This makes a total measurement of 2.5 feet wide, and 5 feet deep.
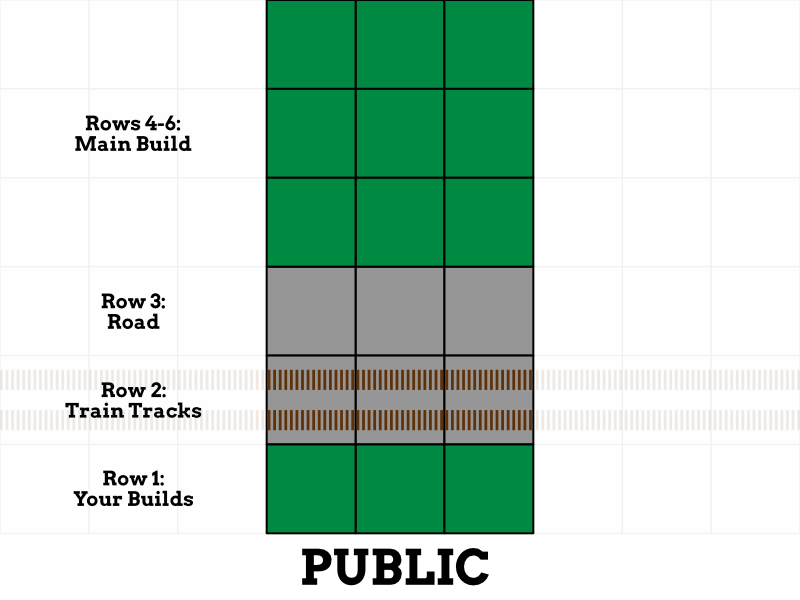
To maintain a consistent, workable loop, each section follows a general layout from front (public) to back:
Front row with custom builds
Train track row (2 lines)
Road row
Main build row
Main build row
Main build row
Edges of each section that connect to neighbors must match these standards to ensure a cohesive display.
Layout Details
Front (Row 1)
Requirements
The front row sits at the edge of the table against the plexiglass. The row is built to a height of 1 baseplate, 1 brick, and 1 plate at the edges, which is the standard MILS height.
Consistency
The height at the edges should match neighboring sections. The brick beneath the landscape on the front edge should match the color of the landscaping, while bricks at the back or sides are hidden and may be any color.
Notes
Front baseplates can feature any custom build, or be kept sparse. They are typically kept at a smaller height to ensure trains and rear sections remain visible.
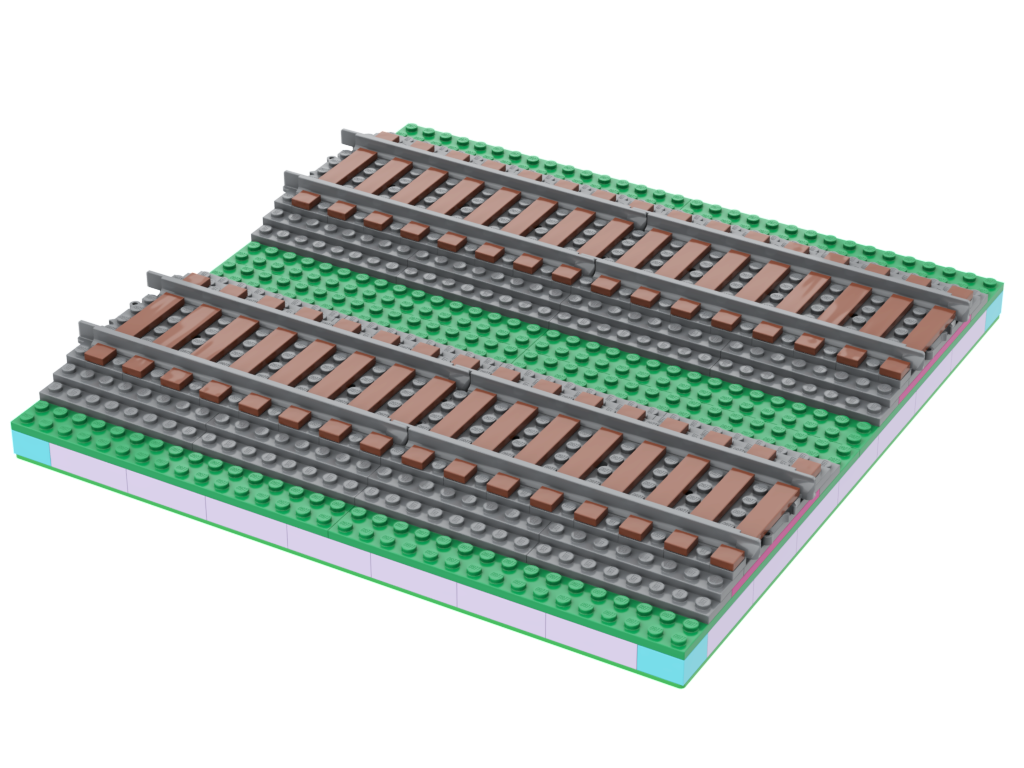
The track row is built on a baseplate with a brick and plate for landscaping, maintaining the same height as the front row. Two plates of dark bluish-gray ballast sit on top of the landscaping, with the tracks above. When ballast is not used, the tracks rest directly on two bricks. The track starts 4 studs from each edge, with the ballast beginning 2 studs from the edge.
Consistency
Unlike other rows, the tracks must remain straight and level across the entire section. Landscaping can vary, but the track alignment must be consistent to allow trains to run smoothly.
Notes
Railroad ties start on the audience’s right side and go every other stud. Ties are typically reddish-brown.
Builders often add a single plate along the edge next to the road to smooth the height difference between the tracks and the road.
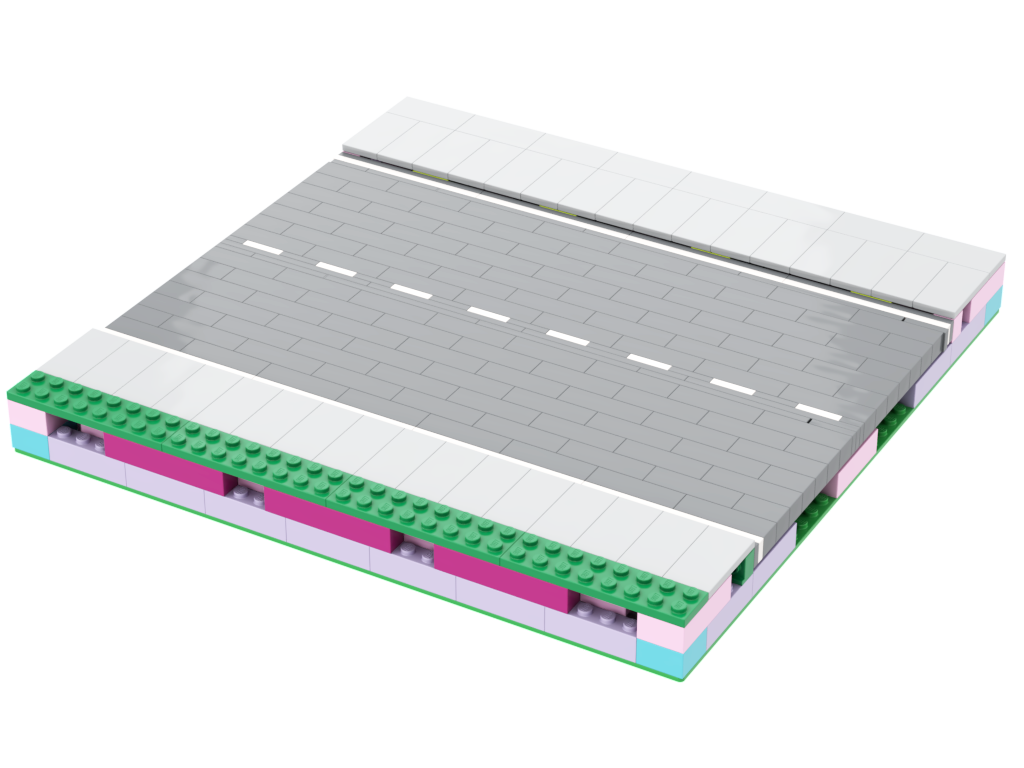
The road row is built on a baseplate with two bricks and a plate for landscaping. The road itself sits one plate lower than the surrounding landscaping, creating a small curb. Typically, there are two studs of landscaping before a 4-stud sidewalk (usually light bluish gray), followed by a 20-stud-wide road, a second sidewalk, and the final two studs, which can either extend the sidewalk or transition to the main build in the next row.
The preferred road color is dark bluish gray, but black is also common.
SNOT RoadRoad with Road Plates
Consistency
Only the edges of each section need to match neighboring MODs for a cohesive loop. The height of the road at the edges and the position of the sidewalks must align with adjacent sections. Curves, intersections, and cross-streets are all things that have been done within a single section.
Notes
Two road types are commonly used:
SNOT Road: Built using bricks sideways (studs not on top or SNOT). The road rests on a single brick and allows flexibility for custom road striping.
LEGO City Road Plates: Road plates sit on a brick and a plate, with additional bricks or SNOT sections added on the sides to achieve the 20-stud width requirement.
Be creative elements such as curb details, crosswalks, streetlights, small landscaping features, or more!
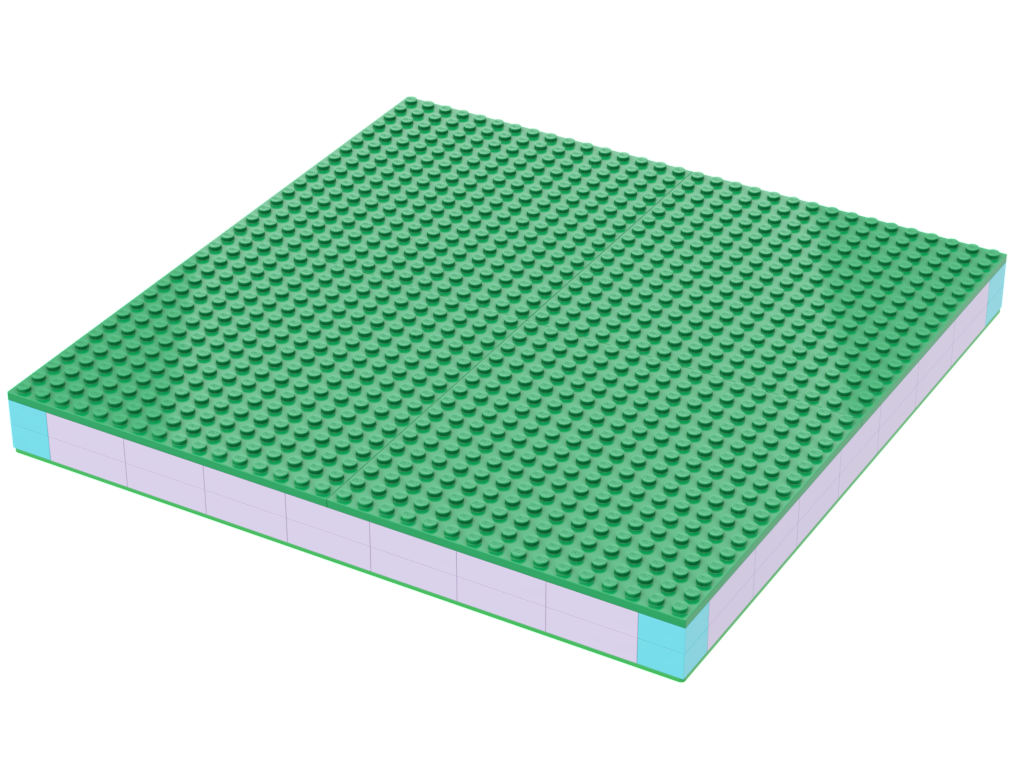
The main build rows sit on a baseplate on top of two bricks, flush with the sidewalk. This establishes the standard edge height for the section.
Consistency
The height is the only required at the edges to match neighboring MODs and maintain a cohesive layout. Interior height and landscaping can vary freely.
Notes
This is the fun part! Let your imagination be your guide.
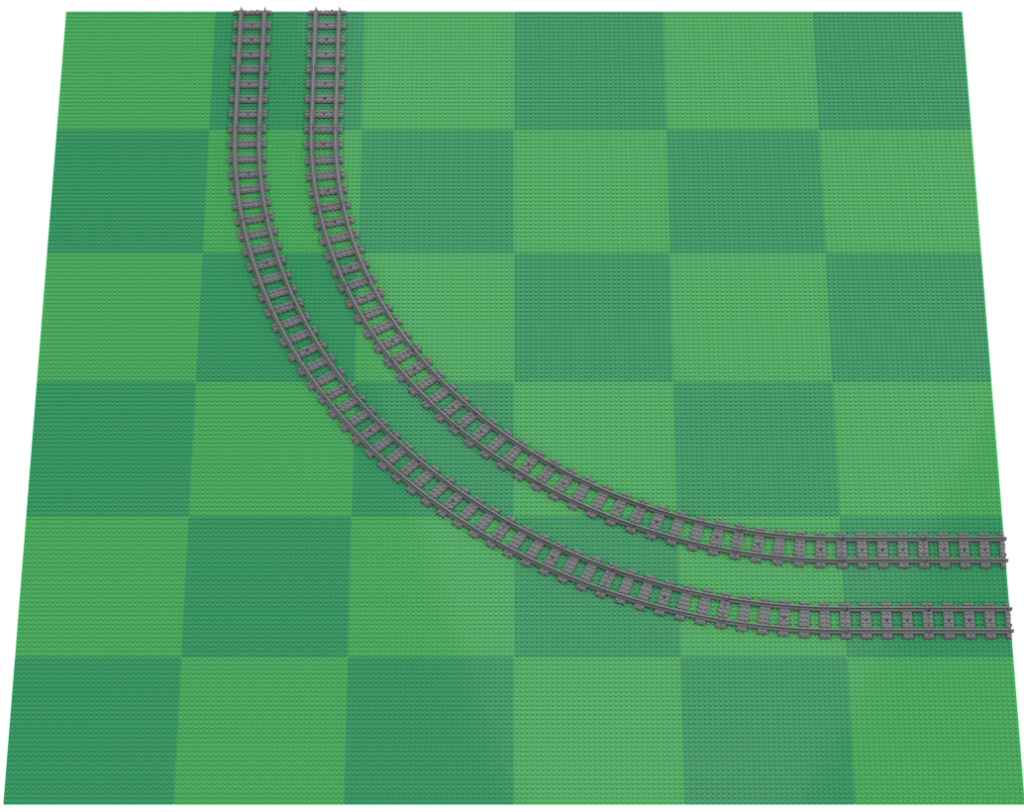
A corner section is the equivalent of two regular sections (6 baseplates by 6 baseplates). Wide turns are required so trains can run consistently. The inside track has a turn radius of R104, and the outside track has a turn radius of R120.
Consistency
Tracks must remain level with standard track sections for the entire corner.
Notes
Because LEGO does not produce track for these wide turns, the club uses third-party track. Builders can borrow corner track from the club or get recommendations on where to order their own. The partial digital model1 shows where track pieces are placed on the section baseplates, and ballasting/baseplate instructions from L-Gauge can be used as guidance.
For additional questions, ask for advice in the train loop channel on Discord (members only). Often, the L-Gauge community has more comprehensive track standards. The ULUG standards aren’t a complete match, but they are a good guide if there are unique questions. A few common topics are referenced below.
Power: This Standard makes no provisions for electrified track. All trains are expected to provide their own on-board power.
Scenery: Scenery within 8 studs of track center on any Mainline shall be kept at or below rail height.
Tunnels: Tunnels, overpasses and other overhead obstructions shall be a minimum of 16 bricks (6 inches / 15.4 cm) above rail height.