
A major feature at many of our events is the train loop, where multiple builders connect their sections side by side and run trains across many different builds. For the loop to work smoothly, all builders must follow a set of standards for track placement, heights, and track alignment.
Layout Overview
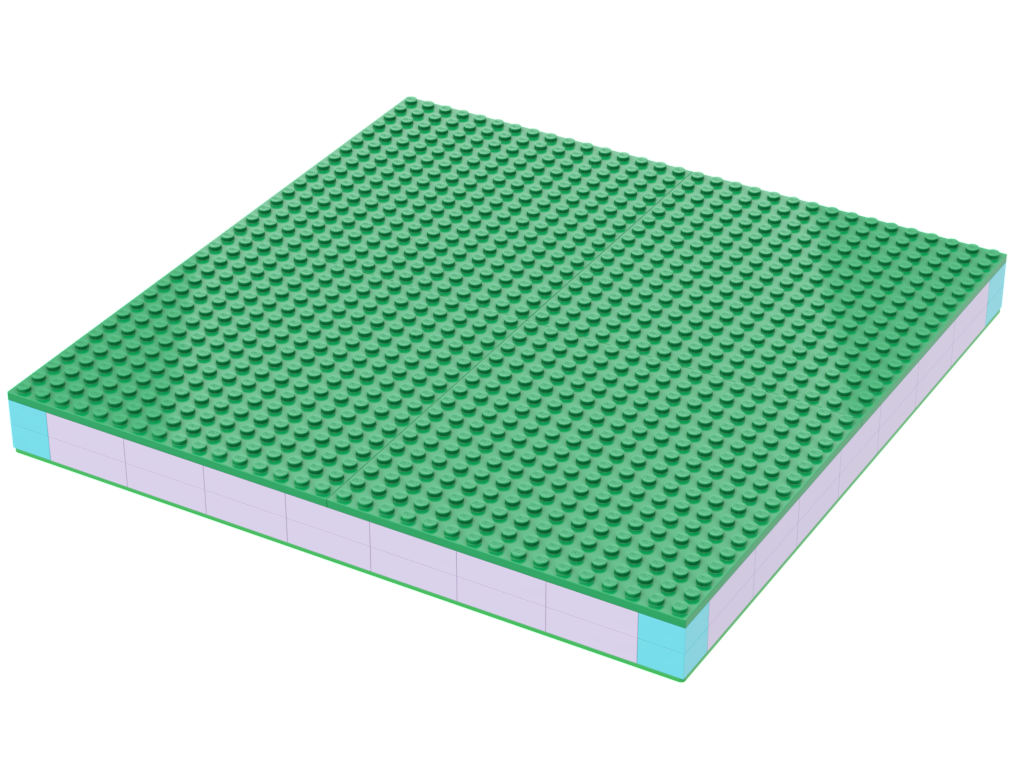
Each section of the loop (called a MOD, as is common with train clubs), has a basic layout of 3×6 standard LEGO baseplates (32×32 studs each). This makes a total measurement of 2.5 feet wide, and 5 feet deep.
To maintain a consistent, workable loop, each section follows a general layout from front (public) to back:
- Front row with custom builds
- Train track row (2 lines)
- Road row
- Main build row
- Main build row
- Main build row
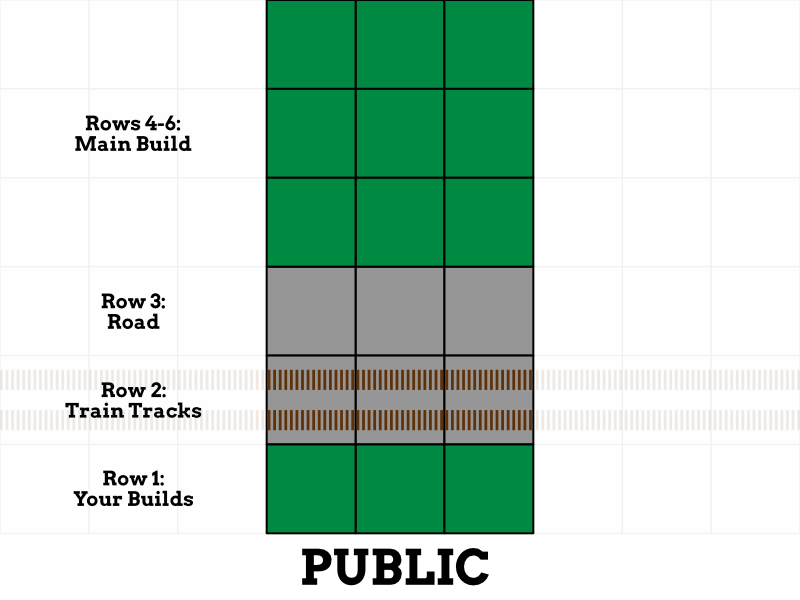
Edges of each section that connect to neighbors must match these standards to ensure a cohesive display.
Layout Details
Front (Row 1)
Requirements
The front row sits at the edge of the table against the plexiglass. The row is built to a height of 1 baseplate, 1 brick, and 1 plate at the edges, which is the standard MILS height.

Consistency
The height at the edges should match neighboring sections. The brick beneath the landscape on the front edge should match the color of the landscaping, while bricks at the back or sides are hidden and may be any color.
Notes
Front baseplates can feature any custom build, or be kept sparse. They are typically kept at a smaller height to ensure trains and rear sections remain visible.
Make Your Own Front ROw
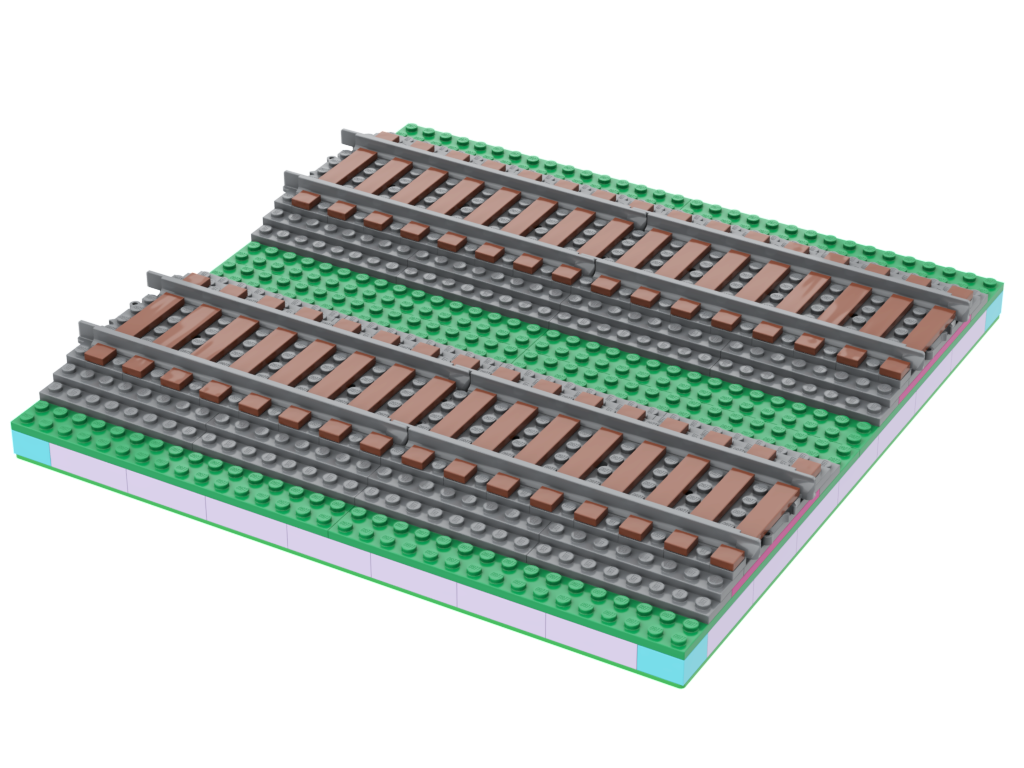
Train Tracks (row 2)
Requirements
The track row is built on a baseplate with a brick and plate for landscaping, maintaining the same height as the front row. Two plates of dark bluish-gray ballast sit on top of the landscaping, with the tracks above. When ballast is not used, the tracks rest directly on two bricks. The track starts 4 studs from each edge, with the ballast beginning 2 studs from the edge.

Consistency
Unlike other rows, the tracks must remain straight and level across the entire section. Landscaping can vary, but the track alignment must be consistent to allow trains to run smoothly.
Notes
Railroad ties start on the audience’s right side and go every other stud. Ties are typically reddish-brown.
Builders often add a single plate along the edge next to the road to smooth the height difference between the tracks and the road.
Make Your Own Train Tracks
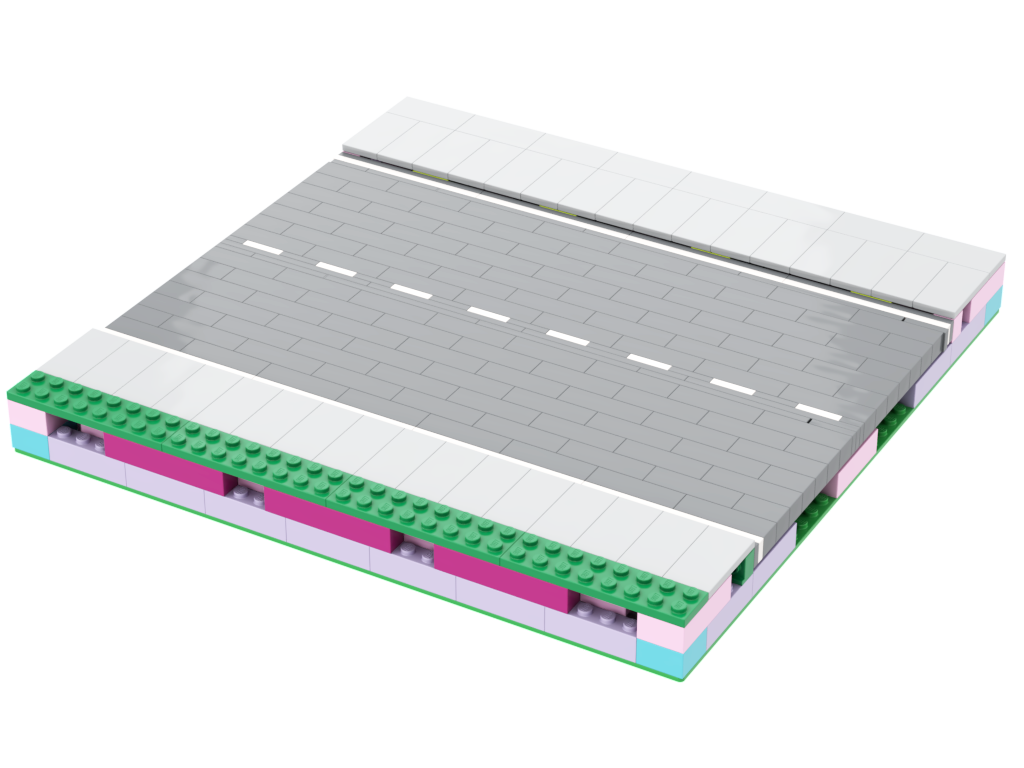
Road (Row 3)
Requirements
The road row is built on a baseplate with two bricks and a plate for landscaping. The road itself sits one plate lower than the surrounding landscaping, creating a small curb. Typically, there are two studs of landscaping before a 4-stud sidewalk (usually light bluish gray), followed by a 20-stud-wide road, a second sidewalk, and the final two studs, which can either extend the sidewalk or transition to the main build in the next row.
The preferred road color is dark bluish gray, but black is also common.


Consistency
Only the edges of each section need to match neighboring MODs for a cohesive loop. The height of the road at the edges and the position of the sidewalks must align with adjacent sections. Curves, intersections, and cross-streets are all things that have been done within a single section.
Notes
Two road types are commonly used:
- SNOT Road: Built using bricks sideways (studs not on top or SNOT). The road rests on a single brick and allows flexibility for custom road striping.
- LEGO City Road Plates: Road plates sit on a brick and a plate, with additional bricks or SNOT sections added on the sides to achieve the 20-stud width requirement.
Be creative elements such as curb details, crosswalks, streetlights, small landscaping features, or more!

Make Your Own SNOT Road
Make Your Own with Road Plates

Main Build (Rows 4-6)
Requirements
The main build rows sit on a baseplate on top of two bricks, flush with the sidewalk. This establishes the standard edge height for the section.

Consistency
The height is the only required at the edges to match neighboring MODs and maintain a cohesive layout. Interior height and landscaping can vary freely.
Notes
This is the fun part! Let your imagination be your guide.
Make Your Own Custom Section

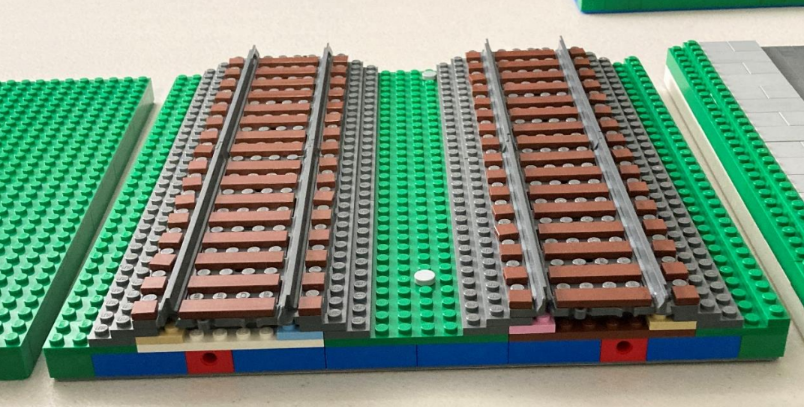
Corner Sections
Requirements
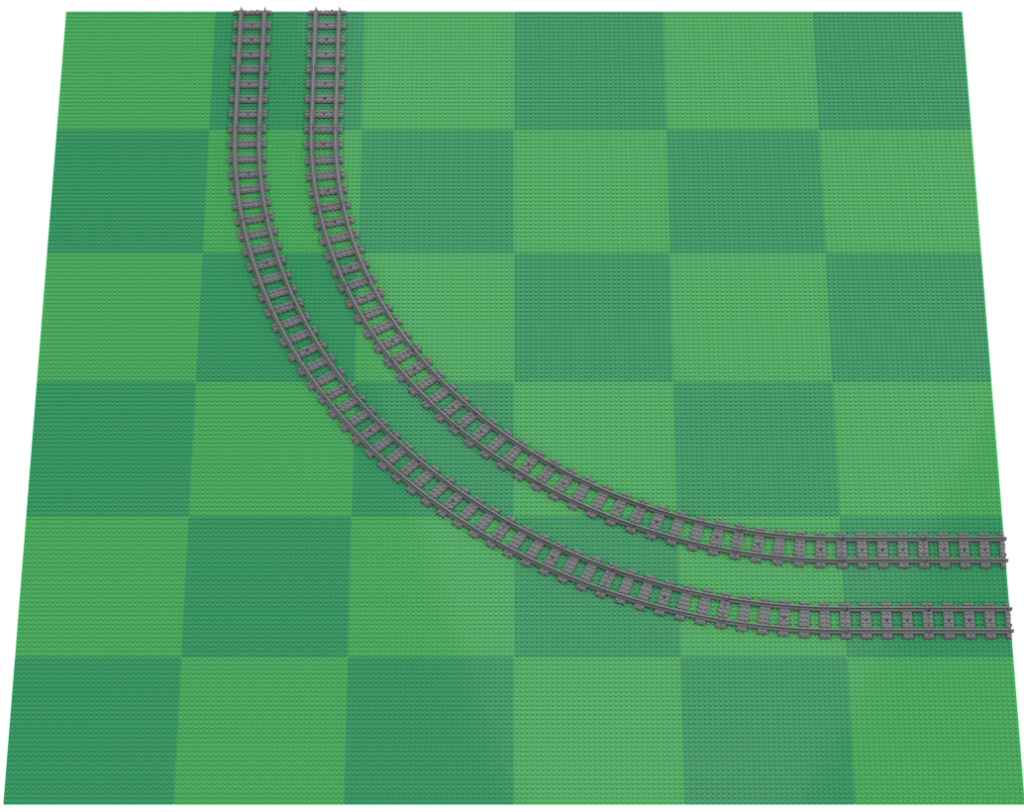
A corner section is the equivalent of two regular sections (6 baseplates by 6 baseplates). Wide turns are required so trains can run consistently. The inside track has a turn radius of R104, and the outside track has a turn radius of R120.
Consistency
Tracks must remain level with standard track sections for the entire corner.
Notes
Because LEGO does not produce track for these wide turns, the club uses third-party track. Builders can borrow corner track from the club or get recommendations on where to order their own. The partial digital model1 shows where track pieces are placed on the section baseplates, and ballasting/baseplate instructions from L-Gauge can be used as guidance.
Make Your Own CorNER Section
Additional Information
For additional questions, ask for advice in the train loop channel on Discord (members only). Often, the L-Gauge community has more comprehensive track standards. The ULUG standards aren’t a complete match, but they are a good guide if there are unique questions. A few common topics are referenced below.
- Power: This Standard makes no provisions for electrified track. All trains are expected to provide their own on-board power.
- Scenery: Scenery within 8 studs of track center on any Mainline shall be kept at or below rail height.
- Tunnels: Tunnels, overpasses and other overhead obstructions shall be a minimum of 16 bricks (6 inches / 15.4 cm) above rail height.
- Curve track digital models from BrickTracks. ↩︎